QuickBooks classes are ideal when you need to analyze finances across accounts, income, expenses, customers, jobs, vendors. Classes help you track financial results by categories such as business unit, location, partner, or item. Classes can span time and items, too, because you assign a class to individual transactions (such as checks, bills, sales receipts, and invoices) as well as to specific line items on invoices or bills.
Here’s an example of how to put classes to work: I use classes to track profit and loss for each of my self-published books.
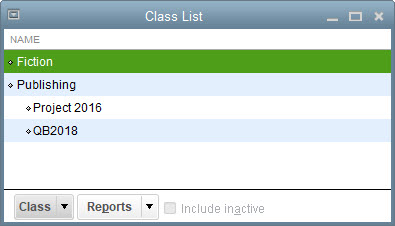
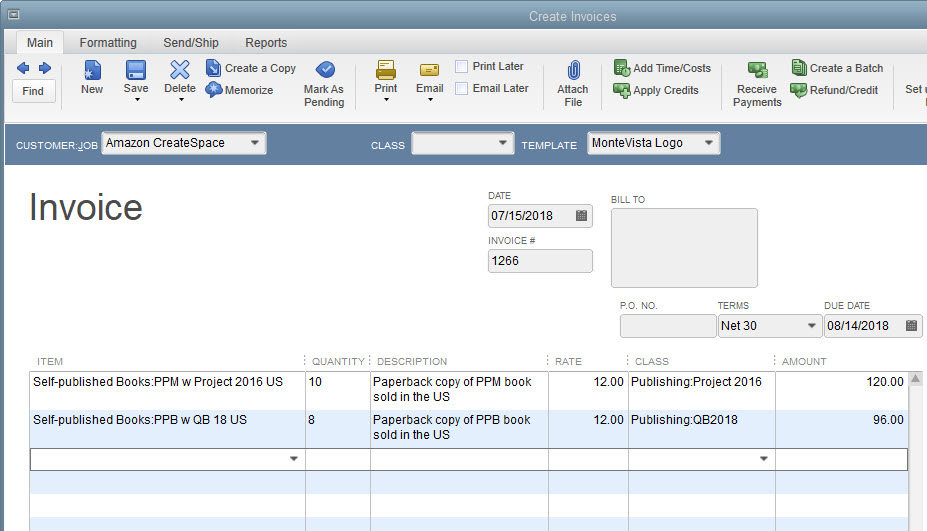
I create a class for each self-published book.
Because payments from publishers include royalties for all my books, I assign the appropriate class to line items in transactions. If a customer like a school purchases only one book, I can assign the corresponding class to the entire invoice. Similarly, I can assign classes to bills for printing or advertising.
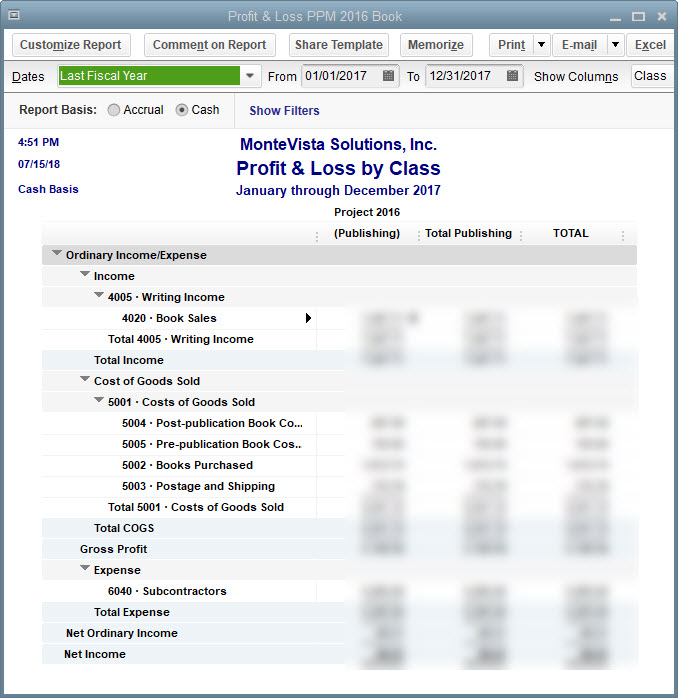
Finally, I use a Profit and Loss by Class report to see profit and loss for each book.
Here’s another class example: tracking profitability for a monthly publication or event. Start by creating classes for each month. Then assign income and expense transactions to the class that corresponds to the publication month, such as May. That way, you can track ad income or printing expenses for the May issue, even if the transactions occur in March, April, or July. Then, the Profit and Loss by Class report can show profitability for each publication or event.
Note: Classes also come in handy for tracking the allocation of functional expenses that nonprofit organizations have to show on financial statements.
Here are a few tips for using classes effectively:
Pick one use for classes. QuickBooks has only one list of classes, so every class should represent the same type of classification. However, if you want to use classes for two different purposes—business units and office branches, say—you can create top-level classes for each business unit and subclasses for office branches within each top-level class.
Use classes consistently. Make sure to use classes on every transaction that relates to your classification method. For example, if you classify income and expenses by partner, assign a class to every invoice and expense that’s related to a partner’s work; otherwise, your class-based reports won’t be accurate. But if expenses are overhead and don’t relate to the work partners do, create a class for overhead and assign that class to all overhead transactions. That way, you can run a report like Profit & Loss Unclassified to look for transactions where you forgot to assign a class.
Create a catchall class. Set up a class like Other so that you can still classify transactions even if they don’t fit into any of the specific classes you’ve defined.
For more helpful tips about QuickBooks, check out my book, Practical Bookkeeping with QuickBooks 2018 — which won an Award of Excellence in the Apex 2018 Awards for Publication Excellence.